A garbage disposal is a convenient appliance that helps manage food waste, keeping your kitchen clean and reducing the chances of clogged drains. However, like all appliances, it has a lifespan. If your garbage disposal is leaking, making unusual noises, or not functioning properly, replacing it may be necessary.
In this detailed guide, we’ll walk you through everything you need to know about garbage disposal replacement, from recognizing the signs of a failing unit to installing a new one successfully.
Why garbage disposal replacement?
Before we dive into the replacement process, it’s essential to understand why you might need to replace your garbage disposal in the first place. Here are some common reasons:
1. Frequent Clogs
If your garbage disposal replacement frequently gets clogged, even when you’re careful about what you put down the drain, it could be a sign that the unit is wearing out or that the motor isn’t powerful enough to handle your food waste.
2. Strange Noises
Unusual grinding, humming, or rattling noises could indicate that something is stuck inside or that the internal components are damaged.
3. Persistent Odors
Food particles can accumulate over time and cause bad smells. If cleaning doesn’t resolve the odor, it may be time for a replacement.
4. Leaks
Leaks around the disposal unit, especially near the sink flange or drain pipe, often mean that the seals or gaskets are worn out. Replacing the unit may be the best solution.
5. Poor Performance
If your garbage disposal struggles to grind food or takes longer than usual, it could mean the blades are dull or the motor is failing.
6. Unit Won’t Turn On
If your disposal doesn’t turn on, even after pressing the reset button and checking the circuit breaker, it may be time to install a new one.
Tools and Materials Needed for Garbage Disposal Replacement
Before beginning the replacement process, gather the following tools and materials:
Tools
- Adjustable wrench
- Screwdrivers (flathead and Phillips)
- Plumber’s putty
- Pipe wrench
- Bucket or large bowl (to catch water)
- Towels or rags
- Pliers
- Wire connectors (if required for electrical wiring)
Materials
- New garbage disposal unit
- New mounting assembly (if necessary)
- Dishwasher drain hose (if applicable)
- Electrical cord (if your new unit requires one)
How to Replace a Garbage Disposal: A Step-by-Step Guide
Step 1: Turn Off the Power and Water
Safety is the top priority when garbage disposal replacement. Follow these steps:
- Locate your home’s circuit breaker and turn off the power to the garbage disposal.
- Confirm the power is off by trying to turn on the disposal.
- Shut off the water supply to prevent leaks.
Previous article; William and Kate latest news and Updates
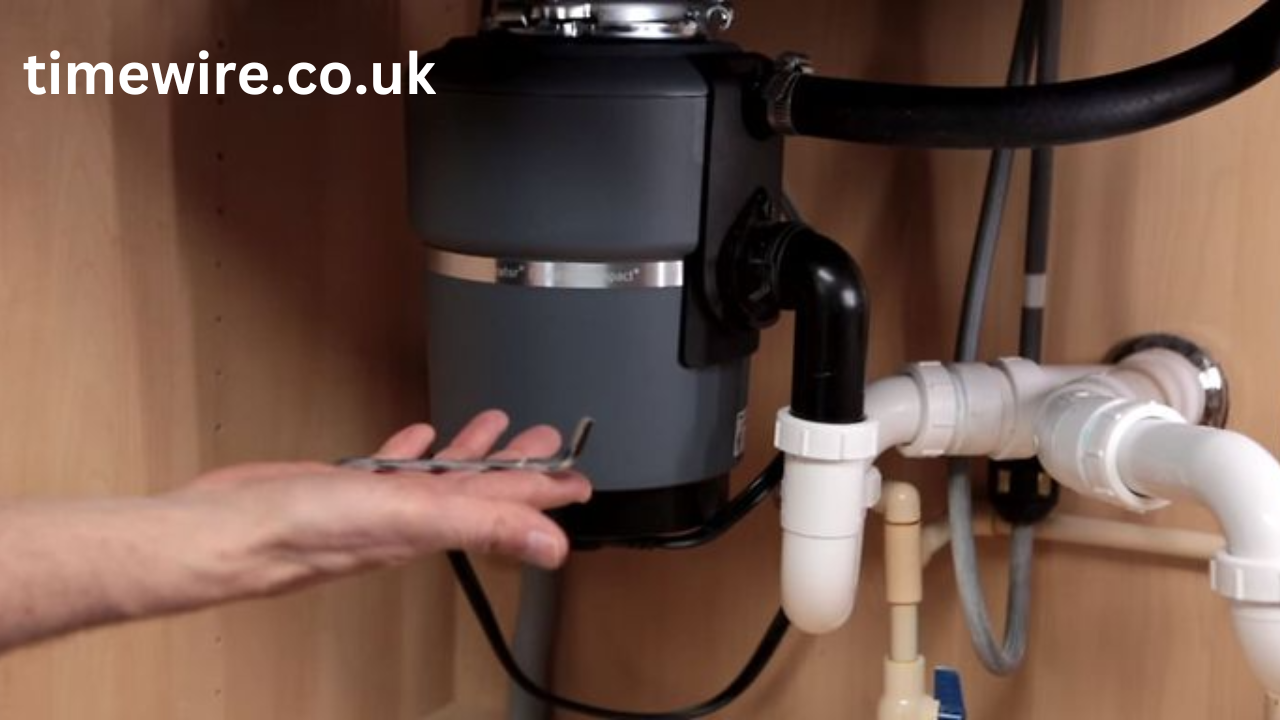
Step 2: Remove the Old Garbage Disposal
- Place a Bucket Under the Sink
- Since removing the disposal may cause water to spill, position a bucket under the sink to catch any excess water.
- Disconnect the Drain Pipe and Dishwasher Hose
- Use a wrench to loosen the slip nuts that connect the drain pipe to the disposal unit.
- If your dishwasher is connected to the disposal, remove the dishwasher hose as well.
- Detach the Disposal from the Mounting Ring
- Most disposals are attached to the mounting ring under the sink. Use a screwdriver to loosen the mounting screws.
- Twist the disposal counterclockwise to unlock it from the mounting ring and carefully lower it down.
- Remove the Electrical Wiring (if applicable)
- If your disposal is hardwired, remove the electrical cover plate at the bottom.
- Disconnect the wires by unscrewing the wire connectors.
Step 3: Install the New Mounting Assembly
If your new garbage disposal requires a different mounting assembly than the old one, you’ll need to replace it.
- Remove the Old Mounting Assembly
- Loosen the screws on the mounting ring and remove it.
- Push up on the sink flange from underneath to remove it.
- Install the New Sink Flange
- Apply plumber’s putty around the sink opening and press the new sink flange into place.
- Place the backup ring, fiber gasket, and mounting ring onto the flange from underneath the sink.
- Secure everything with mounting screws.
Step 4: Install the New Garbage Disposal
- Attach the Electrical Wiring (if applicable)
- If your garbage disposal requires an electrical cord, connect the wires following the manufacturer’s instructions.
- Secure the wires with wire connectors and close the electrical cover plate.
- Mount the Disposal Unit
- Align the disposal unit with the mounting ring and twist it into place.
- Tighten the mounting screws to secure the unit.
Step 5: Reconnect the Plumbing garbage disposal replacement
- Attach the Drain Pipe
- Connect the drain pipe to the disposal’s discharge outlet and tighten the slip nuts.
- Reconnect the Dishwasher Hose (if applicable)
- If your dishwasher drains into the disposal, reconnect the dishwasher hose to the designated inlet.
Step 6: Test the New Garbage Disposal
- Turn on the Water
- Run water into the sink and check for any leaks around the connections.
- Turn on the Power
- Switch the power back on at the circuit breaker.
- Test the Disposal
- Turn on the garbage disposal and listen for any unusual noises.
- Run food scraps through it to ensure proper functionality.
Garbage Disposal Maintenance Tips
To extend the lifespan of your new garbage disposal, follow these maintenance tips:
1. Avoid Hard or Fibrous Foods
- Avoid putting bones, fruit pits, coffee grounds, and fibrous vegetables (like celery) into the disposal, as these can damage the blades or clog the unit.
2. Run Cold Water While Using the Disposal
- Always run cold water before, during, and after using the disposal to help wash food particles down the drain.
3. Clean the Disposal Regularly
- Clean the unit by grinding ice cubes and citrus peels to remove buildup and odors.
4. Use Baking Soda and Vinegar
- Pour a cup of baking soda and vinegar into the garbage disposal replacement once a month to break down grease and eliminate odors.
5. Avoid Pouring Grease Down the Drain
- Grease and oil can solidify inside the disposal, leading to clogs. Dispose of them separately.
Frequently Asked Questions (FAQs)
1. How Long Does It Take to Replace a Garbage Disposal?
It usually takes 1 to 2 hours to replace a garbage disposal, depending on experience and whether new wiring or plumbing adjustments are needed.
2. Can I Install a Garbage Disposal Myself?
Yes, if you have basic plumbing and electrical skills, you can install a new garbage disposal yourself. However, if you’re unsure about electrical wiring, hiring a professional is recommended.
3. How Long Do Garbage Disposals Last?
Most garbage disposals last between 8 to 15 years, depending on usage and maintenance.
4. What’s the Best Garbage Disposal to Buy?
Popular brands include InSinkErator, Waste King, and Moen. Consider horsepower (½ HP for small households, ¾ HP for medium use, and 1 HP for heavy-duty grinding).
Conclusion
Garbage disposal replacement is a straightforward DIY task if you follow the right steps. By identifying when a replacement is needed, gathering the necessary tools, and carefully following the installation guide, you can save money on professional installation and ensure your kitchen remains functional.
With proper maintenance, your new garbage disposal will serve you well for years to come!