A 3-way switch allows you to control a light or electrical fixture from two different locations. This type of wiring is commonly used in staircases, hallways, and large rooms with multiple entry points. Properly how to wire a 3 way switch requires an understanding of electrical wiring principles, safety precautions, and the correct tools and materials.
This comprehensive guide will walk you through everything you need to know about wiring a 3-way switch, including necessary tools, how the circuit works, and a step-by-step wiring procedure. By the end of this guide, you will have the knowledge to safely and successfully wire a 3-way switch system
Understanding how to wire a 3 way switch
Unlike a standard single-pole switch, which has only two terminals (on/off), a 3-way switch has three terminals plus a ground terminal. The three terminals include:
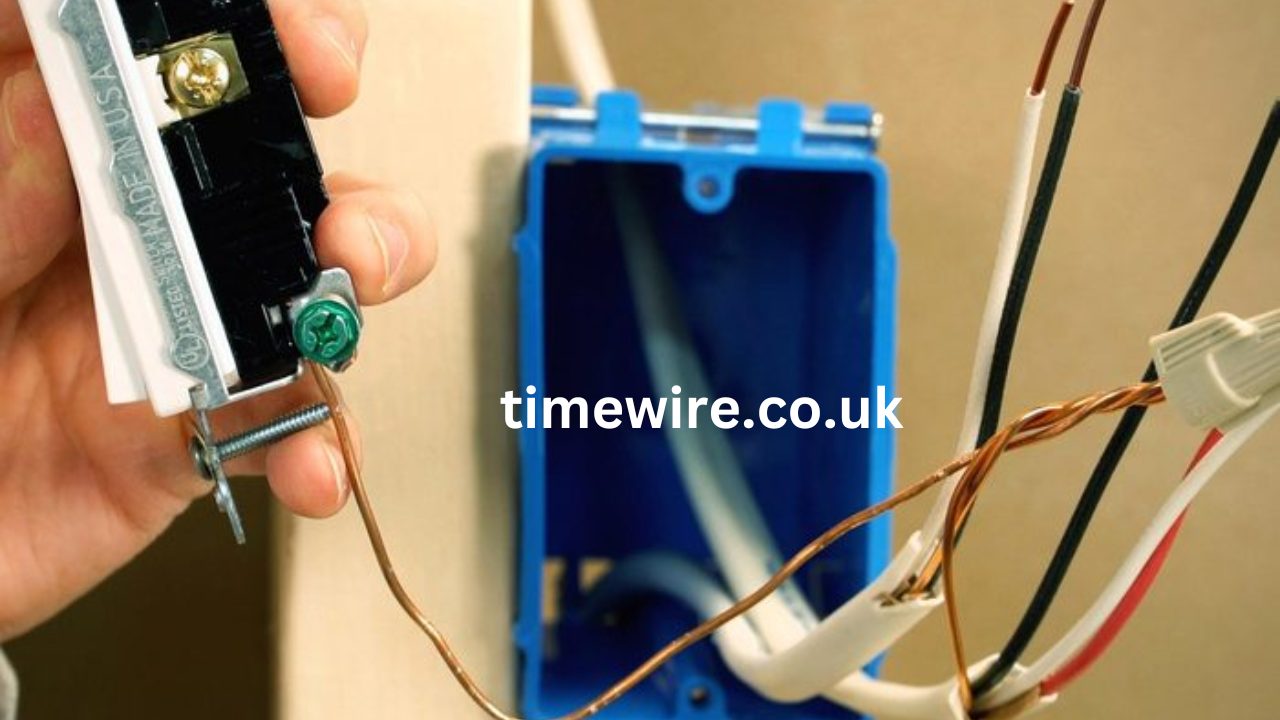
- Common Terminal (Black Screw) – This is the most important terminal. It connects to either the power source (hot wire) or the light fixture, depending on the switch’s position.
- Traveler Terminals (Brass Screws) – These terminals connect the two switches, allowing current to flow between them. The position of these switches determines whether the circuit is completed.
- Ground Terminal (Green Screw) – This terminal connects to the grounding wire to ensure safety and prevent electrical faults.
When wired correctly, how to wire a 3 way switch circuit allows you to turn a light on or off from two separate locations.
Tools and Materials Needed
Before starting the wiring process, gather the following tools and materials to ensure a smooth installation:
Tools:
- Screwdriver
- Wire strippers
- Voltage tester
- Electrical tape
- Needle-nose pliers
Materials:
- Two 3-way switches
- Electrical switch boxes
- 14/3 NM (Non-Metallic) cable (for standard residential wiring)
- 14/2 NM cable (for power source and light fixture connections)
- Wire nuts
- Electrical tape
Safety Precautions Before Wiring a 3-Way Switch
Electrical wiring can be dangerous if not handled properly. Follow these safety guidelines to prevent accidents:
- Turn Off the Power – Always shut off the power at the circuit breaker before working on any electrical wiring. Use a voltage tester to confirm that there is no live current in the wires.
- Use Proper Wiring Tools – Avoid makeshift tools and use proper screwdrivers, wire strippers, and voltage testers for accuracy and safety.
- Double-Check Connections – Incorrect wiring can cause short circuits, electrical fires, or malfunctioning switches. Always verify connections before restoring power.
- Follow Local Electrical Codes – Ensure your wiring meets local building codes to avoid potential hazards or legal issues.
Step-by-Step Guide to how to wire a 3 way switch
Now that you understand the basics of a 3-way switch and have the necessary tools, follow this detailed step-by-step wiring process.
Step 1: Plan Your Wiring Layout
A standard 3-way switch wiring setup consists of:
- A power source (circuit breaker)
- Two 3-way switches
- A light fixture
- Connecting cables
The most common configurations include:
- Power to First Switch → Light Fixture → Second Switch
- Power to First Switch → Second Switch → Light Fixture
Decide on your preferred setup before proceeding.
Step 2: Run the Electrical Cables
You will need to run three different sets of wires:
- 14/2 NM Cable (Power Source to First Switch) – This carries power from the electrical panel to the first switch.
- 14/3 NM Cable (Between the Two Switches) – This cable contains a black, red, and white wire (plus ground) to connect the switches.
- 14/2 NM Cable (Second Switch to Light Fixture) – This carries power from the second switch to the light fixture.
Previous article; How to Make a Bow Out of Ribbon A Step-by-Step Guide
Route the cables through electrical boxes and secure them with cable clamps.
Step 3: Connect the First 3-Way Switch
- Connect the Ground Wire – Attach the bare copper or green wire to the ground terminal (green screw) of the switch.
- Connect the Common Terminal (Black Screw) – Connect the black (hot) wire from the power source to the common terminal of the first how to wire a 3 way switch.
- Connect the Traveler Terminals (Brass Screws) – Connect the red and black traveler wires from the 14/3 NM cable to the brass screws.
- Neutral Wire Connection – The white (neutral) wire from the power source connects directly to the white wire in the 14/3 NM cable using a wire nut.
Step 4: Wire the Second 3-Way Switch
- Connect the Ground Wire – Attach the ground wire to the green terminal of the second switch.
- Connect the Common Terminal (Black Screw) – The black wire from the 14/2 NM cable going to the light fixture connects to the common terminal.
- Connect the Traveler Terminals (Brass Screws) – Connect the red and black traveler wires from the 14/3 NM cable to the brass screws of the second switch.
- Neutral Wire Connection – The white wire from the 14/3 NM cable is joined with the white wire going to the light fixture.
Step 5: Wire the Light Fixture
- Black Wire (Hot) – Connect the black wire from the second switch’s common terminal to the black wire on the light fixture.
- White Wire (Neutral) – Connect the white wire from the power source to the white wire on the light fixture.
- Ground Wire – Attach the ground wire to the grounding screw on the light fixture.
Step 6: Secure the Wiring and Install the Switches
- Carefully tuck the wires into the electrical boxes.
- Secure the switches with screws and attach the cover plates.
- Make sure the light fixture is properly mounted.
Step 7: Restore Power and Test the how to wire a 3 way switch
- Turn the power back on at the circuit breaker.
- Test the switches to ensure the light turns on and off from both locations.
If the light does not function correctly, check the following:
- Make sure traveler wires are connected to the correct terminals.
- Ensure the common terminal is connected to the appropriate hot/load wire.
- Verify all wire connections are secure and properly twisted.
Troubleshooting Common 3-Way Switch Wiring Issues
1. Light Only Works from One Switch
- Check that the common terminals are correctly wired.
- Ensure traveler wires are not swapped between switches.
2. Light Stays On or Off Regardless of Switch Position
- The common terminal may be wired incorrectly.
- Verify that the hot wire is connected to the correct switch.
3. Flickering Light
- Loose wire connections can cause intermittent power loss.
- Secure all wire connections and ensure proper grounding.
Conclusion
How to wire a 3 way switch may seem complex, but by following a structured approach, you can successfully complete the installation. Always prioritize safety by turning off power before working on electrical components and double-checking connections. With the right tools, wiring knowledge, and attention to detail, you can confidently wire a 3-way switch to control your lighting from multiple locations.
Would you like a visual diagram or video tutorial to supplement this guide? Let me know how I can further assist you!